
Import & Export Guides
Mini Cold Storage Installation and Commissioning: A Step-by-Step Guide
Sep
A mini cold storage room is only as good as its installation. The same insulated panels, evaporator and condensing unit can produce a room that holds temperature reliably for years, or one that ices up, leaks, trips its compressor and wastes electricity from the first week. The difference is almost entirely in how it was assembled, piped, tested and started up. This guide walks through the installation and commissioning process step by step, so that whether you are installing it yourself with a local technician or supervising a contractor, you know what should happen and what to check.
Before delivery: the site survey
Installation problems usually start before the equipment arrives. A proper site survey confirms that the floor is level and strong enough, that there is enough clearance around the room for panels to be assembled and doors to swing, and that the condensing unit has a place with free airflow and shade — see our guide to condenser placement. It also checks the power supply: whether the unit needs single-phase or three-phase power, whether the building’s supply and wiring can carry the load, and whether a stabiliser or voltage protection is needed. A drain route is needed for defrost water, and if the room will run below freezing, the floor needs insulation and possibly protection against floor heave.
Step one: panel assembly
Most mini cold rooms are built from sandwich panels joined with cam-locks or tongue-and-groove joints. Assembly usually begins with floor panels (if any), then the wall panels starting from a corner, then the ceiling. Each joint should close tightly, and every seam — especially the internal corners and the ceiling joints — must be sealed with a suitable sealant. An unsealed joint lets warm, humid air into the panel and the room, where it condenses and eventually freezes, degrading the insulation from the inside. Check that panels are plumb and square as you go; a room that is out of square will never let the door seal properly. Our article on PUF vs PIR panels explains the panel types.
Step two: door, evaporator and condensing unit
The door frame must be fixed square so the gasket touches all round. For freezer rooms, the door frame usually has a heater wire to stop the gasket freezing to the frame; confirm it is wired. The evaporator is hung from the ceiling with airflow directed along the length of the room and without obstruction in front of the fans, following the airflow clearance guidance. The ceiling must carry its weight — heavy evaporators may need support from the building structure rather than the panel alone. The condensing unit is mounted outside on a firm base or wall brackets, level, with vibration pads.
Step three: refrigerant piping and drainage
Copper pipes connect the evaporator and condensing unit. Good practice is to cut pipes cleanly, deburr them, and braze joints while passing a low flow of dry nitrogen through the pipe, which prevents oxide scale forming inside. That scale later breaks loose and blocks the expansion valve or damages the compressor — a failure that may not appear for months. Pipe runs should be as short and direct as practical, properly supported, and the suction line insulated along its full length so it does not sweat or pick up heat. The evaporator drain line needs a steady fall to the outside and, in a freezer room, a heater tape inside the cold space so defrost water does not freeze in the pipe.
Step four: pressure test and evacuation
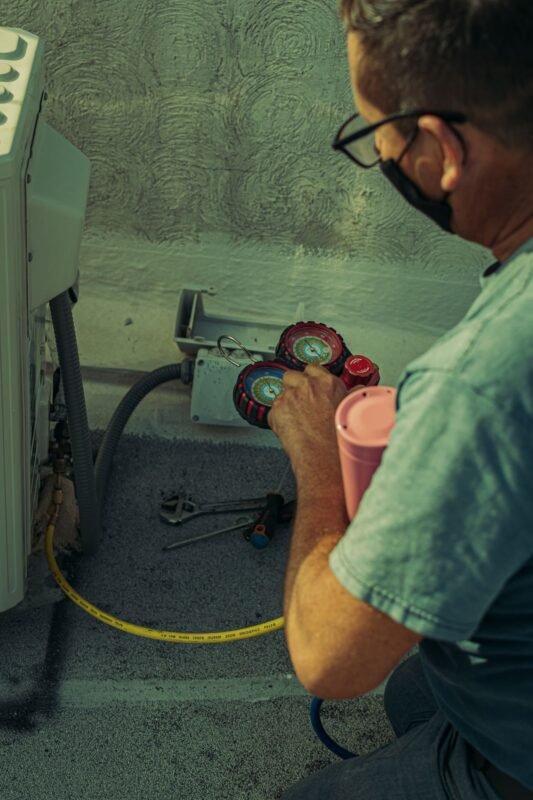
Before any refrigerant goes in, the system is pressurised with dry nitrogen to the test pressure specified by the equipment manufacturer and left to stand. The pressure should not fall; if it does, there is a leak, and it must be found and fixed now, not after charging. Once the system holds pressure, the nitrogen is released and a vacuum pump evacuates the system to remove air and moisture. The vacuum level should be measured with a proper vacuum (micron) gauge rather than judged from the manifold, and the system should hold the vacuum after the pump is isolated. Moisture left in a refrigeration system reacts with oil and refrigerant to form acids and can freeze at the expansion device — skipping or rushing evacuation is one of the most expensive shortcuts an installer can take.
Step five: charging and first start-up
Refrigerant is charged according to the manufacturer’s instructions, ideally by weight using a scale, and then fine-tuned while the system runs by checking pressures, superheat and, where relevant, subcooling. The correct refrigerant type is on the condensing unit’s data plate; our refrigerant guide covers the common options. During the first pull-down, the technician should watch compressor current, pressures and the room temperature curve. For freezer rooms, the pull-down should follow the panel maker’s guidance, and the room needs a pressure relief port: as air inside cools and contracts, a sealed freezer can pull a vacuum strong enough to make the door hard to open or even stress the panels.
Step six: controller setup and handover
The digital controller is programmed with the setpoint and differential for the product being stored, the defrost type, interval and termination, fan delay after defrost, and alarms. A good handover includes a written record of these settings, the refrigerant type and quantity charged, the pressure test and vacuum results, the electrical protection settings, and simple operating instructions for staff. Keep this record: it is what a service technician needs later, and it is often required for warranty claims.
Who should do the work
Panel assembly can be done by a careful general team following the supplier’s drawings, but the refrigeration work — brazing, pressure testing, evacuation and charging — should be done by a trained refrigeration technician with the right tools: a nitrogen cylinder and regulator, a vacuum pump, a vacuum gauge, a refrigerant scale and a manifold suited to the refrigerant. If a technician arrives without a vacuum gauge or nitrogen, that is a warning sign. When equipment is imported from China, confirm before shipment whether the supplier provides installation drawings, wiring diagrams and a recommended refrigerant charge, because these documents make local installation far more reliable.
Problems that appear in the first weeks
Some installation faults take time to show. Frost appearing along a ceiling joint usually means a seam was not sealed. Ice building up in the drain pan points to a drain heater problem or insufficient fall on the drain line. A compressor that trips on high pressure in the afternoon often means the condenser has poor airflow or sits in direct sun. A room that struggles to hold temperature only when the door is used heavily may be undersized for the way it is really used. Report any of these to the installer quickly, while the work is still fresh and under warranty.
Commissioning checklist
- Room reaches setpoint and cycles normally without the compressor running continuously.
- Defrost starts and ends as programmed, and water drains fully to the outside.
- Door closes and seals all round; door heater works on freezer rooms.
- No frost building up on panel joints, door frame or around pipe penetrations.
- Condensing unit runs without unusual noise or vibration, and hot air discharges freely.
- Alarms and any remote monitoring actually send alerts when tested.
Load product only after the room has been stable at setpoint, and add product gradually rather than filling it with warm stock all at once — the room is sized for its design heat load, as explained in our heat load guide. For ongoing care, see maintaining your mini cold storage.
Every shipment is different, so we do not publish one-size-fits-all prices or timelines for mini cold storage supply and installation. Ask us for a quote built around your product, volume and destination — we will tell you honestly what applies to your case. See our full list of services, browse the product catalogue, learn how our China sourcing and buying agent service works, or contact DE International to talk it through.
